Oh gosh, I am so late in putting up my card for Papertake Weekly! I am so out of kilter! I am really hoping I can get back on schedule after this weekend. So anyway, it's sketch week over at PTW, and I LOVE Dawny's sketches! They're always amazing and it takes all the guesswork out of making a card. Since it's the last Tuesday of the month, that means we're being sponsored by the amazing and generous Simon Says Stamp!
First, here's a look at Dawny's awesome sketch
And this is what I did with it!
For my card, I used some of my scrap paper from Three Bugs in a Rug matted by Bazzill cardstock. The doily is a die from Cheery Lynn Designs and the cute elephant is an image from Peggy Love's Vintage. It's on her Collection of Cuties CD. Loooooove it!!! I mean seriously...can you go wrong with a pink gingham elephant? LOL! I just used one of my clear stamps on it's little note and doodled around the edge. I printed it out twice on my paper and cut them both out. They're both mounted with dimensional tape. The flowers and corners are all from Wild Orchid Crafts and the ribbon is from Stamp and Create.
So that's it for me today! Please be sure and pop over to Papertake Weekly to see the rest of the gorgeous creations. Then we'd love it if you'd grab your paper and glue and put Dawny's sketch to good use! Thanks so much for stopping by to see me today and hope to see you back again soon! Hugs!
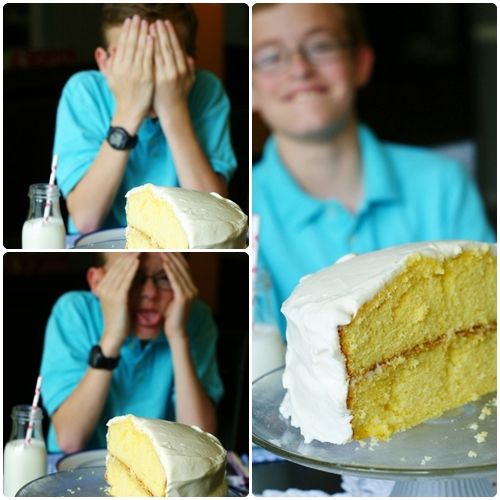
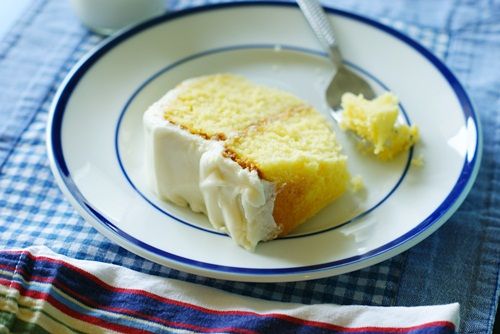
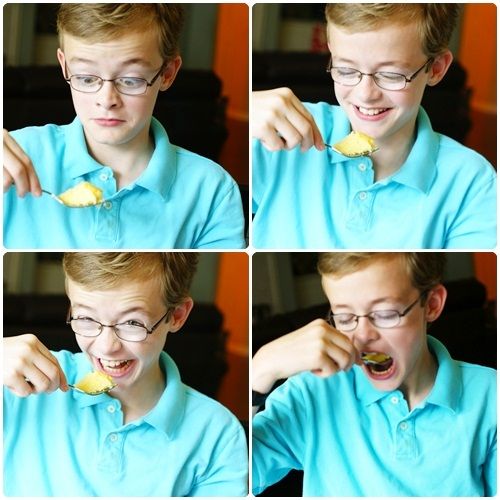
One of my very favorite traditions growing up was celebrating half-birthdays. Not with presents or parties, but with HALF of a cake!
A very, merry UNbirthday, indeed!
Kiddo celebrated his half-birthday over the weekend with HALF of a sweet, tangy and delicious lemonade cake.
I was having tea over at my friend Amanda's (Amanda Carol at Home) house...which, oh, if you ever get a chance to have tea at Amanda's house, jump at it (you'll never want to leave)! Anyway, she told me about a cake she spotted over at The Exchange. I knew I NEEDED it. (I mean, kiddo needed it.)
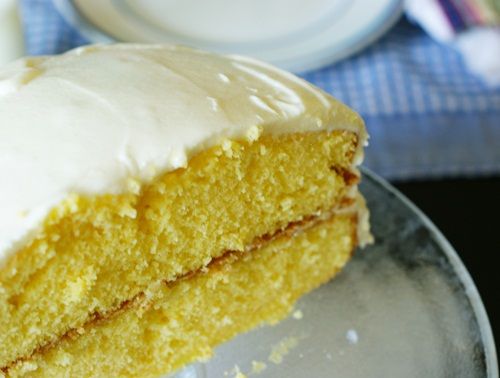
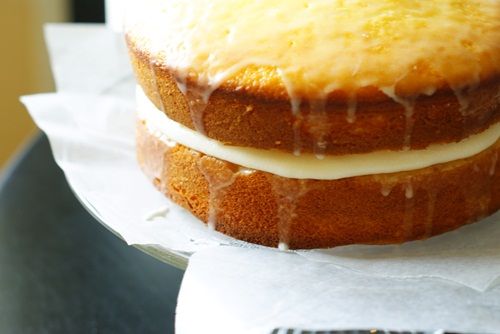
If you love lemon, you are going to LOVE this cake...it's a triple-threat of lemon: cake, glaze and frosting.
I changed a few things from the recipe and am posting it here, but be sure to pop by the original on The Exchange. Her cake is lovely and she gives the history of the cake and tracking down the recipe.
For the cake: 1 (18.25 oz) yellow cake mix 1/3 cup vegetable oil 4 eggs 1 & 1/3 cup buttermilk 1 (4.3 oz) box of lemon pudding zest of one lemon 3 TBSP lemonade concentrate, thawed
For the glaze: 2 cups powdered sugar 1/4 cup freshly squeezed lemon juice 2 TBSP lemonade concentrate, thawed
For the frosting: 1 stick unsalted butter, softened 1 (8 oz) pkg cream cheese, softened 1 tsp vanilla 1/4 cup freshly squeezed lemon juice 1 tsp lemonade concentrate, thawed 4 c. powdered sugar
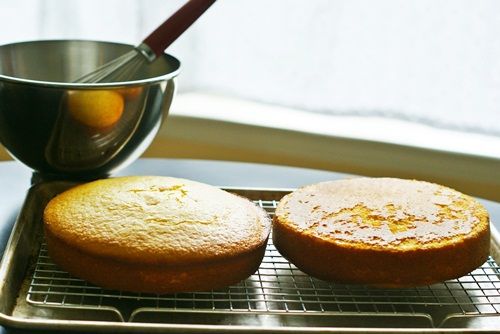
Preheat oven to 350. Grease and flour 2 round 8" cake pans (or use a spray for baking). Line the bottoms with parchment. Grease or spray the parchment.
On low speed, combine all of the cake ingredients until combined. Turn up the speed to medium and beat for 2 minutes. Pour into the prepared pans and bake for 30-35 minutes, or until a toothpick inserted in the middle comes out clean.
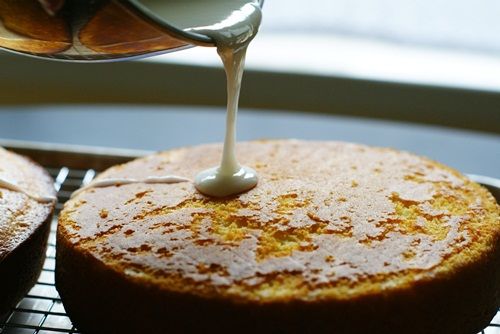
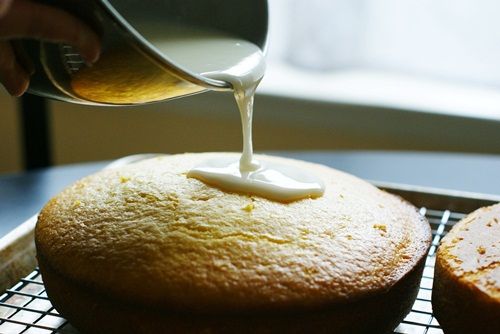
Meanwhile, make the glaze. Whisk together the powdered sugar, juice and concentrate. Set aside. Once the cakes are done, let cool for 10 minutes in the pans on a cooling rack. Invert and remove from the pans. Place the cake with the prettiest top right-side-up and the other cake upside down. Place the cooling rack over a rimmed cookie sheet for pouring the glaze.
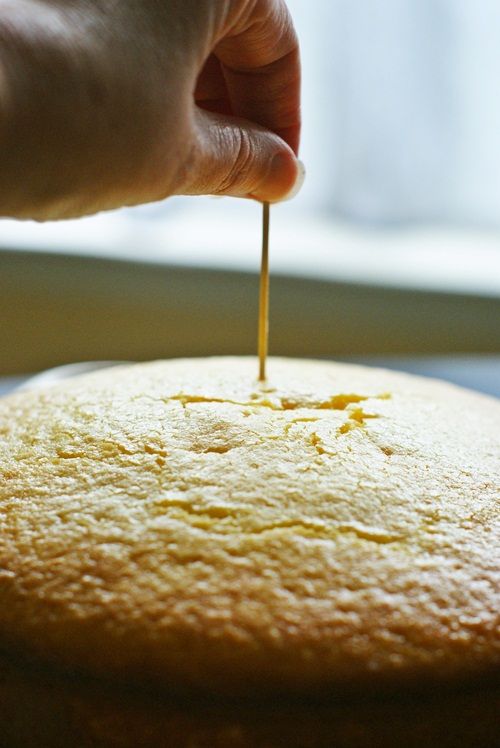
Poke holes in each of the cakes with a toothpick.
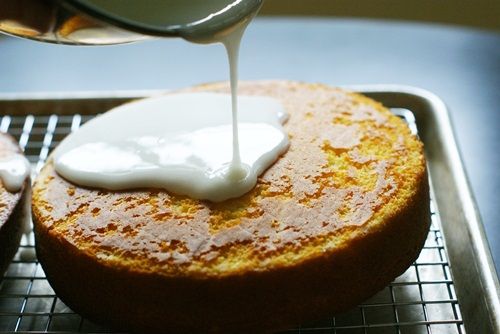
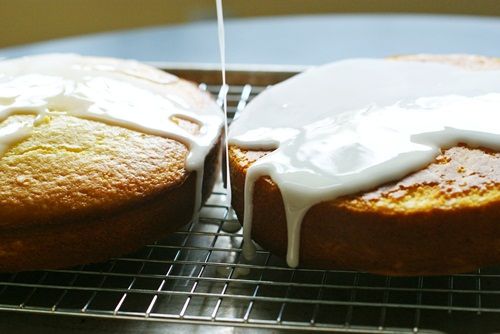
Pour the glaze over.
Oh, you liked that, did you? I have more.
...and more....
....and more.
Let the cakes cool completely.
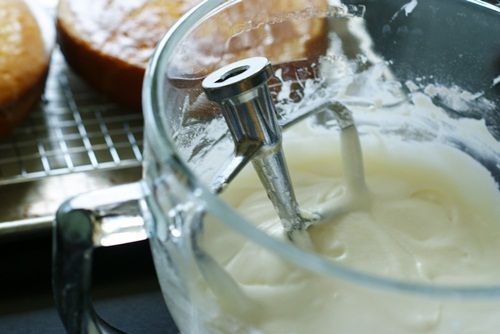
Make the frosting. Cream the butter and cream cheese together until smooth. Beat in the vanilla, lemon juice and concentrate until combined. Add in the sugar, beating at low speed. Increase the speed and beat until fully combined and smooth. Now...here's where I messed up. I bought that "1/3 less fat" cream cheese. Why? I have no idea. Maybe it was guilt over all of the chocolate peanut butter ice cream I ate last week. Anyway, it made my frosting a bit too soft.
If your icing seems too soft to frost the cake, park it in the fridge for an hour or more. Don't get impatient like me and try after 30 minutes or your frosting for the middle will ooze out the sides.
Once frosted, refrigerate 1 hour to set.
If your cake is for a half-birthday, cut the cake in half. (Give the other half away...preferably to the person who told you about the recipe. In my case, Amanda. In your case, well...me.) ;)
Half-birthday cakes are not meant to be fancy, so no decorations here. Just good ol' cake. And 6 more months until my baby is a teenager. {Hold me.}
Happy Monday and welcome to the Bitten by the Bug 2 monthly blog hop! This week we are celebrating summer with fabulous ice cream cones. If you are following the BBTB2 blog hop you arrived here from the amazing Maria’s blog. If you have not been following the blog hop, please consider doing so when you leave my blog.
My amazing design team sister, Maria (mentioned above), chose this week’s BBTB2 challenge cut – the ice cream cone from the Sweet Treats cartridge. The cartridge is on sale this week at Custom Crops, who just happens to be sponsoring my blog for this week’s blog hop! I just spent some time browsing the new items at Custom Crops, and I confess I peeked at the Sizzix sale too!
I ended up working a bit extra on this week’s challenge.I began by making the large card above while I was at the lake last week.At the time I was not truly happy with the card so I decided to try again with the smaller card.However after I arrived home, I attacked the chocolate topping and the phrase “frosty fun” with glossy accents and I realized that I loved the look of the chocolate topping!
I cut the ice cream and the cone from Bazzill embossed cardstock.I love the patterns of this cardstock.I used a brown micro tipped pen and doodled on the embossed patterns – adding a dot to the middle of the flowers on the pink ice cream, and tracing the edges of the pattern on the brown.I loved this look.
My second card is a three leveled flip open card.I used the same techniques on the chocolate topping and the ice cream cone.However, I used different cardstock for the ice cream.I chose Basic Grey’s strawberry print cardstock for the ice cream layer.I stamped the phrase “for you” on the edge of the chocolate topping.
The chocolate layer flips up and to reveal the ice cream layer.You could add another stamp, a charm or a hand written not here. The ice cream also flips up to reveal a white inner layer, where I stamped the phrase “Happy Birthday.”
As I mentioned above, Custom Crops is sponsoring my blog hop this week by offering my lucky winner a $20.00 gift voucher.You can shop the Custom Crops site and apply the voucher code to receive $20 off of your total!As I also mentioned above, Sweet Treats is currently on sale at Custom Crops - just click this link for a great price on this wonderful cartridge!Just leave a comment under this post, be a blog follower and you will be entered to win the gift voucher.I will draw a winner on Thursday.
Thank you for hopping by today.Your next stop is at PenniAnnies blog, the home of our very sweet Penny!Penny has the MOST ADOREABLE project to share with you.Enjoy!
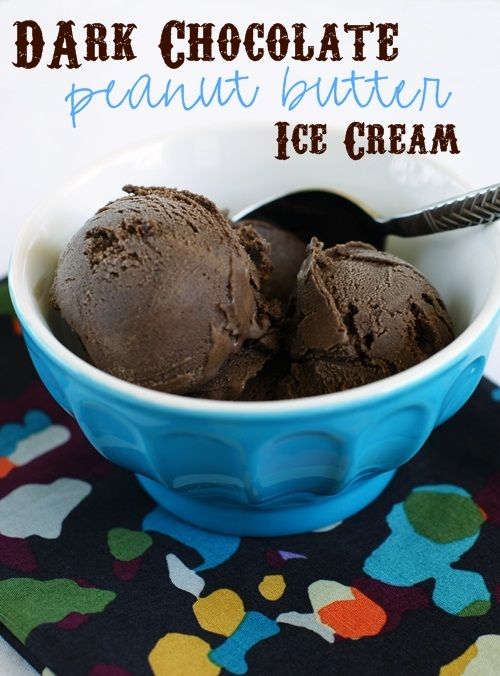
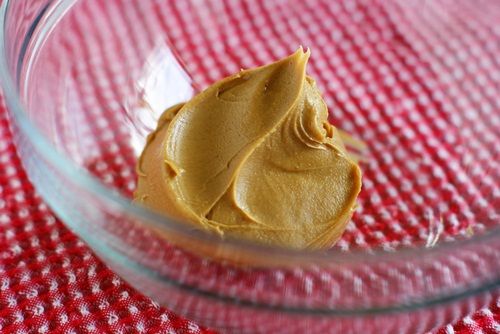
OK...I'm going to get all first-born-child-bossy on you now. If you like chocolate, and you like peanut butter, and you like chocolate WITH peanut butter, you MUST make this ice cream. (Yes, even if it means biting the bullet and buying that ice cream maker. I promise.)
This dark chocolate peanut butter ice cream is rich; it's creamy; it's dreamy. It will change your life. It will make you a happier person.
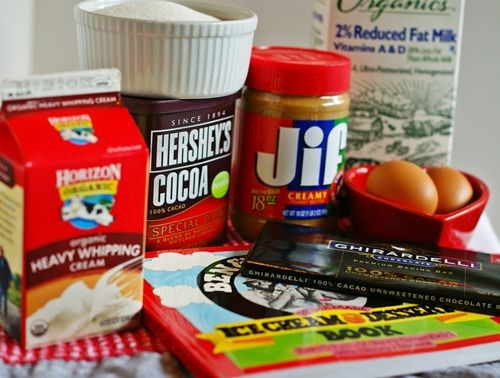
2 oz. unsweetened chocolate ( I like Ghiradelli) 1/3 cup dutch-process cocoa powder (such as Hershey's Special Dark) 1 & 1/2 cups milk 2 eggs 1 cup sugar 1 cup heavy cream 1 tsp vanilla 1/2 cup smooth peanut butter
{This ice cream is made with uncooked eggs, so if you feel uneasy about that or are serving to someone with a compromised immune system, try using pasteurized eggs.}
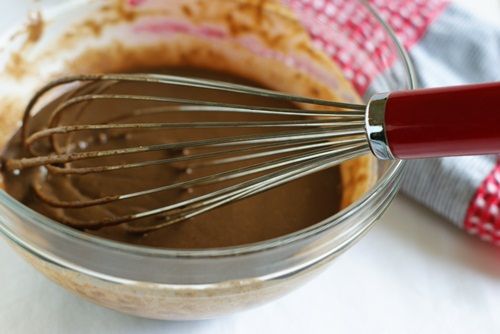
Place a heatproof bowl over a pot of simmering (not boiling) water. Melt the unsweetened chocolate. Gradually add the cocoa; the mixture may clump up in the whisk...that's ok. Slowly pour in the milk, whisking with the chocolate mixture until combined and smooth. Remove from heat and let cool several minutes.
Whisk the eggs in a large bowl until light and fluffy, 1-2 minutes. Add the sugar, a little at a time, whisking constantly. Once all the sugar has been added, whisk 1 minute more.
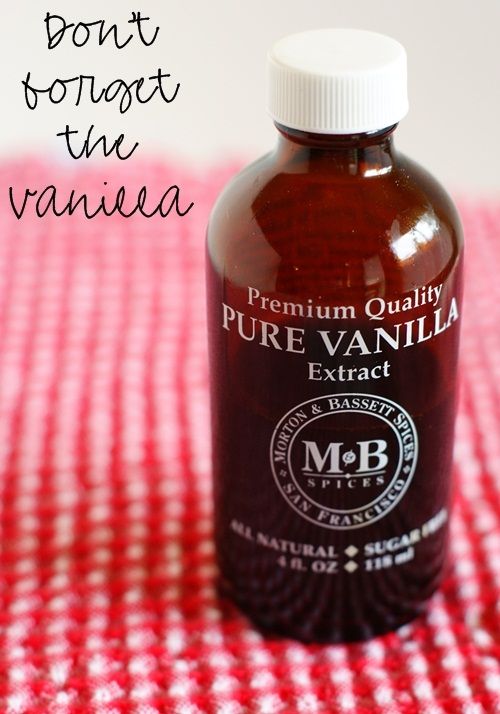
Add the cream and vanilla; whisk to combine.
Pour the chocolate mixture into the cream mixture and stir. Cover and refrigerate a few hours or overnight.
Before transferring to an ice cream maker, remove 1 cup of the mixture into a separate bowl and whisk in the peanut butter until smooth.
{Normally, I'm a natural peanut butter girl, but for this, I go with Jif. It's smooth and creamy and luscious...perfect for this ice cream.}
Add this back into the main mixture and stir. Process in an ice cream maker. Once the freezing cycle finishes, transfer to a freezer-safe container and freeze a few hours to firm up.
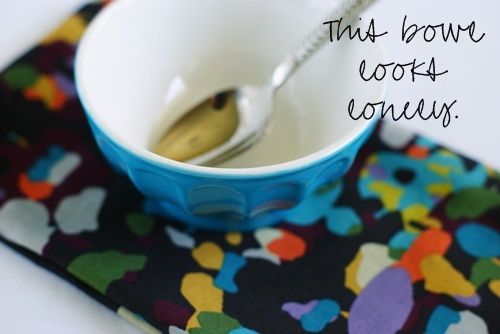
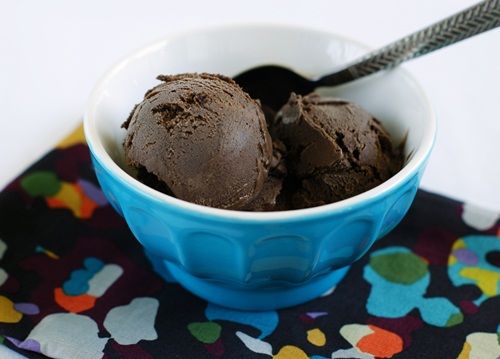
Time to serve it up.
Ahh, there we go...
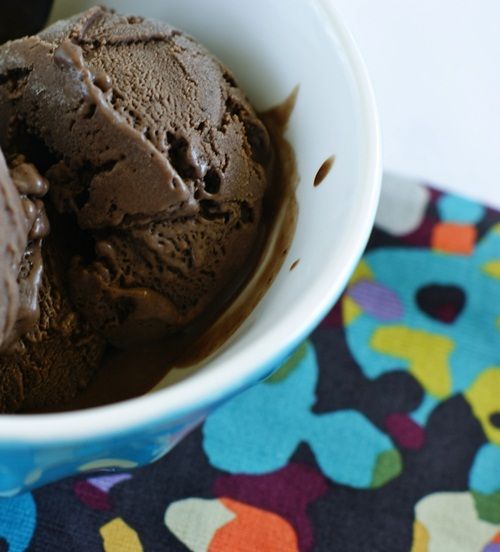
It's worth the calories, my friends. Go ahead, indulge.
Greeting from Lake Murray – again. Yesterday was a fun and busy day here at the lake. We made a shopping trip into Columbia where we visited Michael’s, A.C. Moore, and the Columbiana Mall. I spent all of my time (and money) at Coldwater Creek and Williams Sonoma.
I was asked the name of the place where we are staying…. It is not a public place; it is my friend Beth’s family’s lake house. The house has five bedrooms and is just perfect for our group…. Well I suppose for Beth’s family too.
In the evening we took a sunset boat ride to Bird Island (Google Bird Island Lake Murray for more information on the phenomena). At sunset thousands and thousands of birds flock to the island, circling counter clockwise, singing and flying until just before darkness. It is a very beautiful and amazing sight. Ironically, on the way back from the island we ran out of gas. Whoever took out the boat before us left it nearly empty…. This came as quite a shock to my friend Beth’s dad, who was driving. He had checked the tanks three days earlier and found them full, and he had not taken out the boat in between. What everyone forgot was that Beth’s college age nephew and some friends had spent Sunday and Monday at the lake house and most likely used the boat. Sigh… My friend Kathy sacrificed her acrylic tumbler and the last of the gas from one tank was then drained into the cup and poured into the other tank. This procedure allowed us to coast into the dock on fumes!!! It was a quite an adventure.
As a group we worked on a project for Beth’s daughter’s wedding. We were making the tags for the table favors. We cut two hundred white dog tags from Stand and Salute (the groom was served in Iraq) and two hundred initial sets and affixed them atop the white tags. We then cut two hundred red tags and layered them. The tags will be tied to small bags of personalized M&M’s, which have special meaning the bride and groom.
Between our trips and meals and wedding projects, I played with the Tammy Potter’s Mosaics again yesterday. I scrapped more of the Steeplechase as well as some photos of my older son and his fiancé.
I think today will be more scrapping and less running around, but will be just as fun.